What is AutoSSL?
AutoSSL is WHM/cPanel solution activated by default in your hosting account as it automatically installs and renews cPanel/Sectigo certificates for each domain in cPanel.
AutoSSL performs an automatic check of all domains and if necessary install new or renews the already installed cPanel/Sectigo certificates.
You can easily check, manage or exclude a specific domain from AutoSSL through cPanel » SSL/TLS Status.
All Casbay cPanel hosting plan comes with free Auto SSL.
How to enable AutoSSL / Free SSL in cPanel
Make sure the website is pointing to your server with us. Use a DNS checker to make sure the IP address of the A record is the same as your server IP.
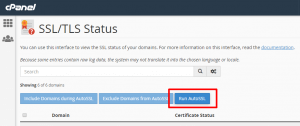
1. Login to cPanel and select SSL/TLS Status.
1. Login to cPanel and select SSL/TLS Status.

2. Next, select Run AutoSSL.

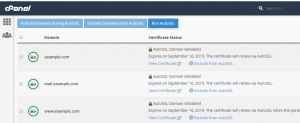
3. You may have to wait for 1 hour for the free SSL installation. Make sure to check the “+ Include during AutoSSL” under the chosen domain/subdomain in the list of domains.

How To Install Let’s Encrypt SSL Certificate in cPanel
- Firstly, access your website cPanel using http://yourdomain.com:2083 or http://yourdomain.com/cpanel
- Under the Security section, click on Let’s Encrypt SSL icon. *Contact your hosting provider if you cannot find the Let’s Encrypt SSL icon.
- Next, click on ” +Issue “ for the domain you want to secure under Issue a new certificate section.
- Then, tick the options for your domain name (non-www and www) and mail server (mail.domainname.com). Choose http-01 as the validation method.
- Lastly, click the Issue button when everything is done.
- Your website will be accessible with https:// in seconds!
The following message will be displayed after the installation is successful:
– The SSL certificate is now installed onto the domain “yourdomain.com” using the IP address. Apache is restarting in the background. –
Check out next article on HOW TO: Add a domain forwarder in Plesk.


